How to change a blade on the Driffy Rotary cutter

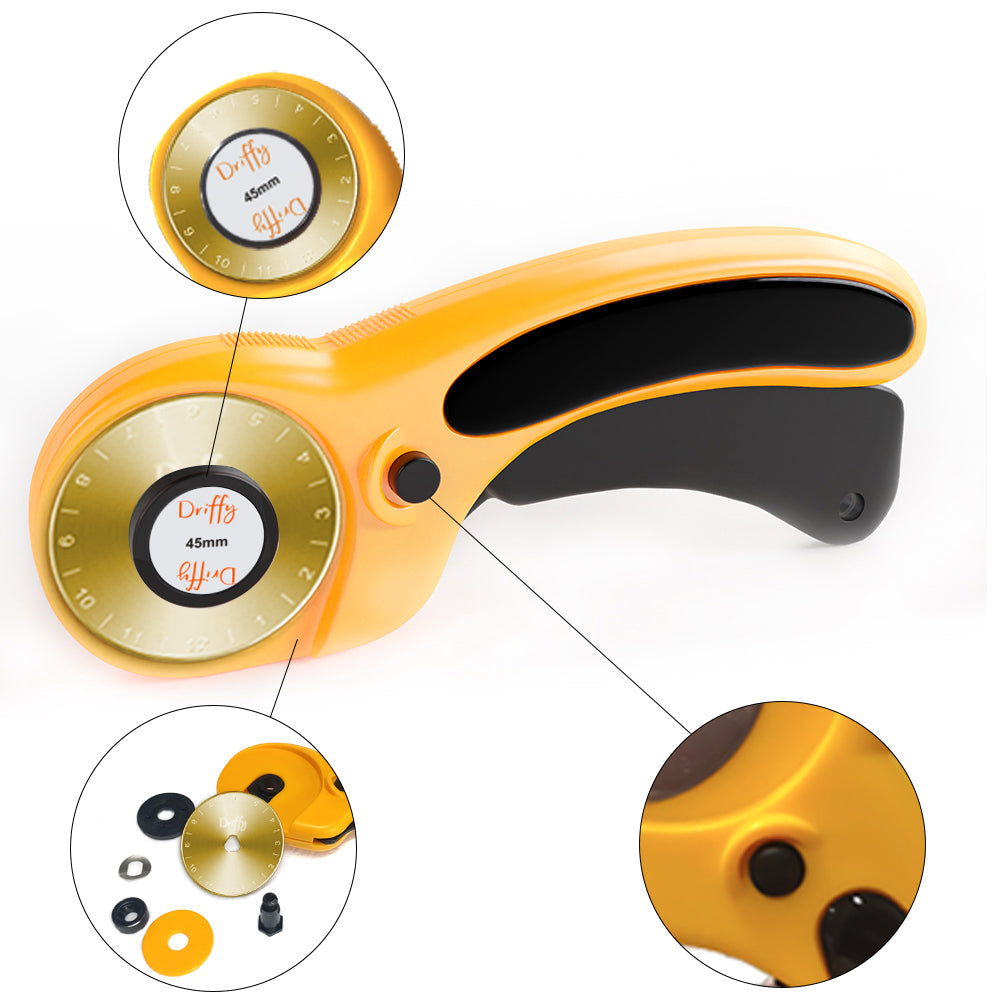
1. This should be all the parts in the Driffy Pack
-------------------------------------------------------------------

2. Take off the yellow washer (the one with the X) and use the spring washer only(green tick)
------------------------------------------------------------------------

3. These are the remaining parts you should use.
-------------------------------------------------------------------

Take the black round shaft as above and place just like in the picture.
---------------------------------------------------------------

Place the Driffy blade, again, like in the picture with the pink arrow
------------------------------------------------------------------------------

A close up of how it should be.
---------------------------------------------------------------------

Take the cutter and place this on the shaft, or with the shaft is facing upwards, feed it through the hole on the cutter. You do this so you keep your hands free of the blade.
----------------------------------------------------------------------------------

Take the little U-SHAPED spring washer next, and place it onto the shaft with the wings of the washer facing upwards. So like the letter "U" place the base of the "U" over the shaft.
-------------------------------------------------------------------------------------------

Then you need to place the nut on. This only goes one way. The bigger hole of the nut faces down towards the shaft. I.E> the smaller hole faces outwards.
------------------------------------------------------------------------------------------------

Tighten the nut until it just touches the spring washer. Then turn a little more. The spring washer forces itself back on the nut, which will lock itself in place. The nut should neither be too tight or too loose. Test this for yourself.
Please contact us should you need any further help.
Your Guide to Safely Changing a Driffy Rotary Cutter Blade
Replacing the blade on your Driffy rotary cutter is a straightforward process that ensures clean, accurate cuts for your crafting and sewing projects. While specific instructions for the Driffy brand are not readily available, the mechanism for changing blades is highly standardized across most rotary cutters. By following these general steps with a focus on safety, you can confidently swap out a dull blade for a fresh, sharp one.
Safety First: Rotary cutter blades are exceptionally sharp and should be handled with the utmost care. Always keep the blade guard engaged when not actively changing the blade. Dispose of old blades in a dedicated sharps container or wrap them securely in heavy paper or tape before placing them in the trash.
Step-by-Step Blade Replacement:
Most rotary cutters, including likely models from Driffy, feature a simple screw and nut assembly to hold the blade in place. Here’s how to safely change the blade on this common type of cutter:
-
Engage the Safety Guard: Before you begin, ensure the blade guard is fully covering the blade to minimize the risk of accidental cuts.
-
Unscrew the Nut: On the back of the cutter head, you will find a nut. Turn this counter-clockwise to loosen and remove it. Some models may have a flat nut that can be loosened by hand, while others might require a small wrench or a coin to turn.
-
Disassemble the Components: Once the nut is removed, carefully take apart the washer and the old blade. Lay all the components on your work surface in the order you removed them. This will serve as a helpful guide for reassembly. The typical order is nut, washer, blade, and then the cutter handle itself.
-
Install the New Blade: Carefully take your new Rotary Cutter blade 45mm out of its packaging. Avoid touching the sharp edge with your fingers. Place the new blade onto the screw post of the cutter handle, ensuring it sits flat and is centered.
-
Reassemble the Cutter: Place the washer back over the blade and screw post. Then, thread the nut back on, turning it clockwise.
-
Tighten Securely: Tighten the nut until it is snug. It should be firm enough to hold the blade securely without any wobbling, but not so tight that the blade cannot rotate freely. Over-tightening can also make it difficult to loosen the next time you need to change the blade.
-
Test the Blade: With the safety guard still engaged, check that the blade rotates smoothly. Then, retract the guard and carefully test the new blade on a scrap piece of fabric to ensure it cuts cleanly and evenly.
For cutters with a different mechanism, such as a quick-change or sliding lock system, the principle remains the same: secure the old blade, carefully remove and replace it, and ensure all components are securely fastened before use. Always refer to any manufacturer's packaging or inserts if available. By prioritizing safety and following these simple steps, you can quickly and easily maintain a sharp, effective Driffy rotary cutter for all your creative endeavors.






Leave a comment
Please note, comments need to be approved before they are published.